Thursday, October 16, 2014

OS X Yosemite USB Install

Here's a simple way to create a USB install disk for OS X Yosemite!

First, download Yosemite from the app store, then format your 8GB+ USB drive in Mac OS Extended (Journaled) format. I'll be using a Lexar P10 USB 3 32GB drive in this example (I highly recommend a USB 3 drive for this install)


Second, run the following command below in the terminal to create the install USB drive. This assumes that the Yosemite installer is in your Applications folder and that your USB drive is labelled Untitled.

sudo /Applications/Install\ OS\ X\ Yosemite.app/Contents/Resources/createinstallmedia --volume /Volumes/Untitled --applicationpath /Applications/Install\ OS\ X\ Yosemite.app --nointeraction


Your USB drive should now be labeled "Install OS X Yosemite". To boot from this drive, hold down the Option key when booting your Mac and select the USB drive.

Monday, October 13, 2014

Dropcam over PoE (sort of)

I was looking to replace my Samsung SNV-7080R locate at my front door with something that I could more easily access remotely and record from. The 7080R had a built in SD card for edge recording, but I had no remote access to the camera when away from home without setting up as VPN or public recording server.

Ideally, I wanted to setup a Dropcam in it's place, but I couldn't find a cheap way to power it since it would be located in the ceiling. I had already run CAT5e to the location since the 7080R was a PoE camera. After a few weeks of searching, I came across this product from WiFi-Texas.com. This USB over Ethernet device is great for iPads and other devices that require power from USB. The only issue that I have with it is that it's not 802.1af compliant, so I have to use their 24v power adapter instead of my PoE 48v switch.

Parts:

  • Dropcam Pro 
  • WS-POE-5v10w w/ power adapter & USB adapter ($25 eBay)
  • Ethernet cable CAT5e/CAT6
  • USB Cable


Basic setup


Dropcam charger and PoE charger


Dropcam installed


Attic view of cabling


View from camera


I've had this installed for two months now and have to say it's a much better solution than the 7080R it has replaced. I have not had any issues with the camera and it's great to be able to check it from my phone and web browser. Now that I have the ability to power these over Ethernet, I will definitely be adding a few more in the future!

IKEA BEKANT Sit/Stand Desk

Recently, IKEA came out with a new desk series under the name BEKANT. I assume this will be replacing the GALANT series of desks, as some of them seem to no longer be available on the website. This comes at a great time as I'm currently shopping for a sit/stand desk. After looking at desks from Steelcase and HumanScale, what I really wanted want to have my current GALANT desk in a sit/stand configuration. The IKEA fairy must have heard my wish, because that is what the new BEKANT desk is. So, as soon as this was available at my local IKEA, I rushed out and purchased one.

Previous office with GALANT desk


New BEKANT desk


The desk has electronic height control which is essentially an up and down button. It's range is 22" - 48" which is sufficient for me at 6'0". I also like the new white base (also comes in black) verses the old silver base on the GALANT. The next step will be to add a monitor arm to raise the monitor up to eye level.

Friday, August 29, 2014

Remotely Change IP on Cisco Router/Switch

A project I was working on required an IP address update for a remote site. Usually, the protocol would be to call out a local tech and have them console into the device and either update the configuration or I would RDP into their machine and complete the same task. This works great, but costs money for an on-site visit. I figured there must be a way to perform this remotely and save a little cash in the process.

Most Cisco routers and switches allow you to upload a .txt file to local storage, usually Flash:, with which you can copy the contents of the .txt to the running-config. The beauty of this method is that the commands in the .txt are run from the local CLI and not a VTY line. This will allow you to update an IP address completely as compared to being disconnected half-way through.

In the example below, I'll demonstrate how to change the IP address and default gateway on a switch:

   1.  Create a .txt file with the commands you wish to run, e.g. Change01.txt

        interface vlan1
        no ip address 192.168.0.2 255.255.255.0
        ip address 10.0.0.2 255.255.255.0
       !
       no ip default-gateway 192.168.0.1
       ip default-gateway 10.0.0.1
       !

   2. Upload the .txt file to the switch

        copy tftp://192.168.0.10/Change01.txt Flash:/Change01.txt

   3. Important! As a precaution, since you will be performing this remotely, set the switch to automatically reload in case something does not go correctly. You can cancel the scheduled reload afterwards if everything goes as planned. The command below will automatically reload the switch in 15 minutes if not cancelled.

        reload in 15

   4. Copy the changes in the .txt file to the running-config

        copy Flash:/Change01.txt running-config
 
   5. At this point your remote session to the switch will drop and you'll need to establish a new session to the switch with the new address. If you are able to remote to the switch with the new IP and accept the changes, then you can cancel the reload and save your changes.

        reload cancel

       copy running-config startup-config
 
   6. Optional - If your changes did not go as planned and you're locked out or unable to remote back in, don't fret, the switch will automatically reload at the end of the timer you configured in step 3 and the original configuration will be loaded.


Wednesday, May 21, 2014

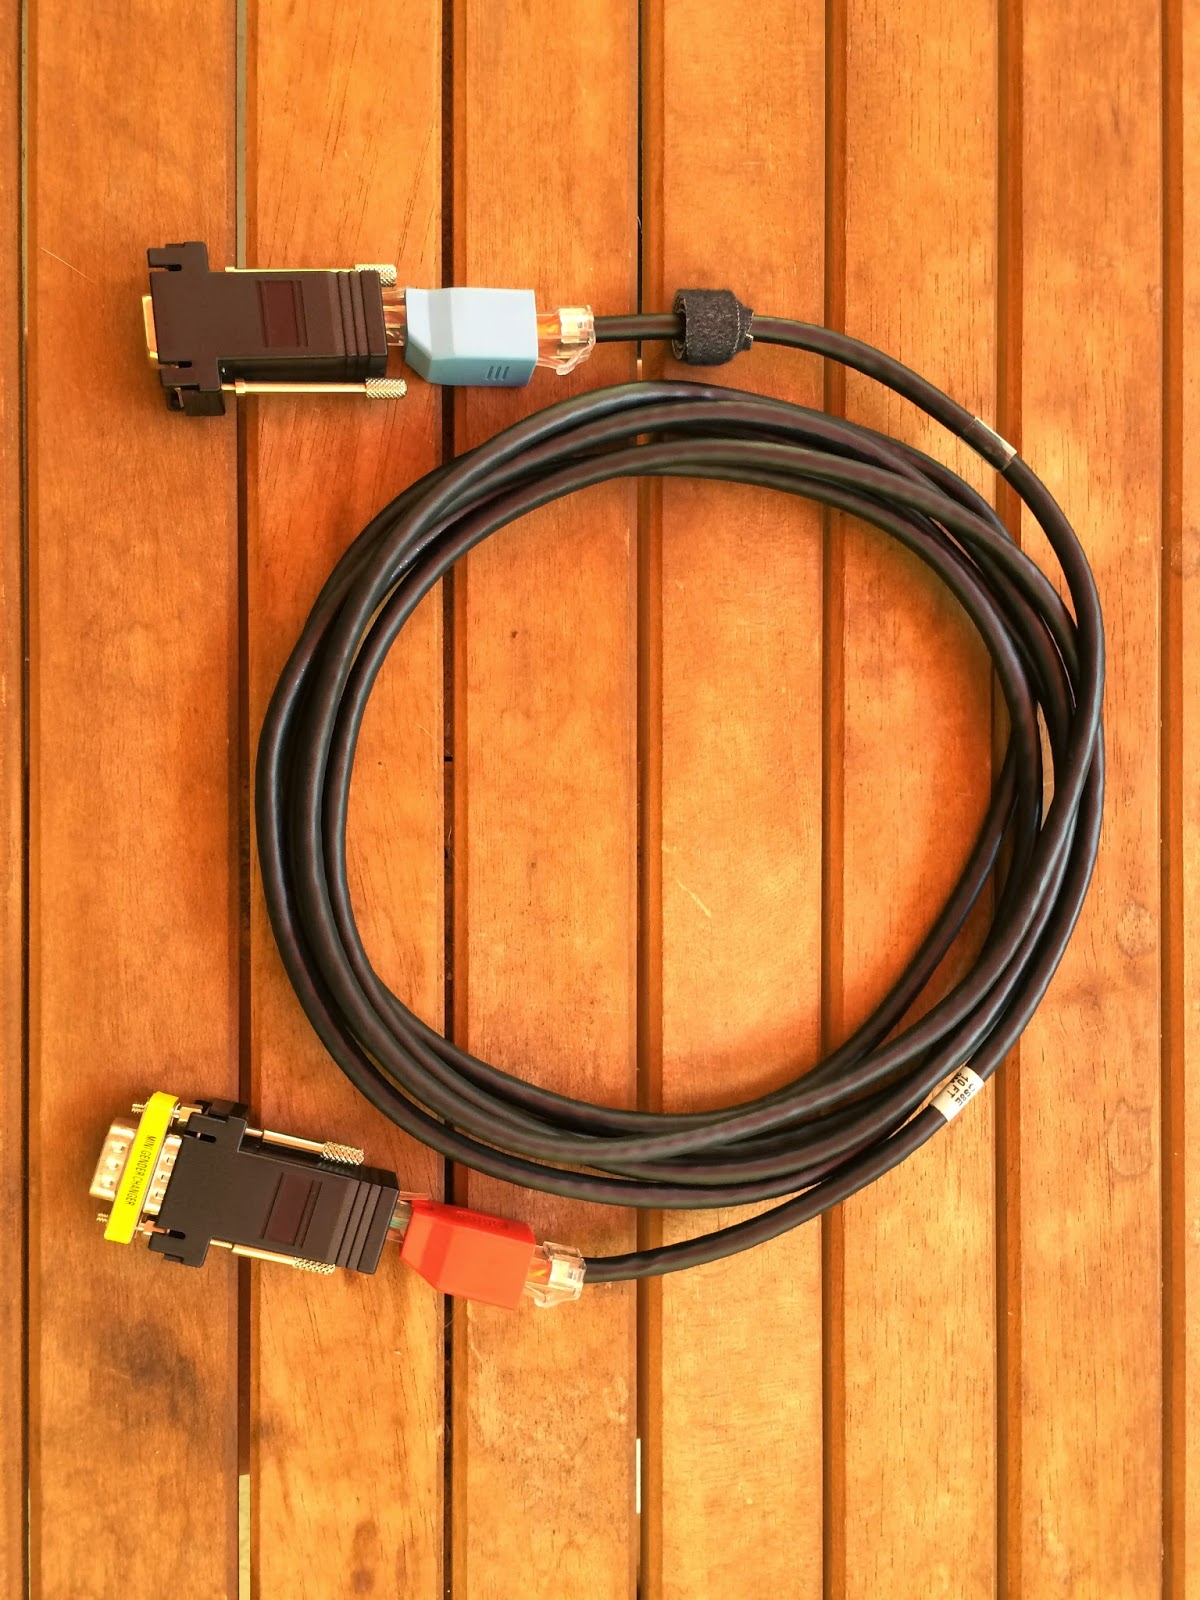
X-in-1 Network Admin's Cable

Based on Michael Ossmann's 5-in-1 Network Admin's Cable, I decided to create my own version with a few upgrades/updates. 

Here are the components I selected:


I chose the FT232R chipset due to it's excellent driver support in Windows and OS X.


Here are some of the most common configurations:

Stored Configuration
Cisco Console Cable
Null Modem Cable
Crossover Cable
USB-to-DB9 Console Cable


Wednesday, August 21, 2013

Cisco WS-X4013+TS ROMMON Upgrade

I recommissioned a Cisco 4503 switch today with a SUP II+TS and whenever I get the chance to wipe a switch or device and start fresh I like to upgrade the IOS and ROMMON if applicable. This procedure was slightly different from a Router ROMMON upgrade:
   
   ! Copy the ROMMON image to the bootflash:
   Switch#copy ftp://192.168.1.1/cat4500-ios-promupgrade-122_31r_SGA4 bootflash:cat4500-ios-promupgrade-122_31r_SGA4

   ! Once copied, reload the switch
   Switch#reload

   ! Press Crtl-C to enter ROMMON during bootup and run the following command
   rommon 1 > boot bootflash:cat4500-ios-promupgrade-122_31r_SGA4

After the ROMMON upgrade has completed, the switch wil reload automatically and boot into IOS. You can perform a show version to verify that the ROMMON has been upgraded.

More detailed instruction can be found in the Release Notes of the ROMMON image.

Monday, August 19, 2013

Zone Based Firewall Example, Part 2 - Guest Zone

Zone Based Firewalls (ZBF) are an easy way to turn your Security licensed Cisco ISR G2 Router into a firewall. In this multi-part example, I'll create a 5 zone firewall which will include an Inside, Outside, DMZ, Guest and Self zones. This is a basic example to demonstrate the the structure of a ZBF, not a study in firewall design.

Just to clarify:

DMZ - Your Demilitarized Zone for web servers and FTP servers

Guest - Wireless guest access to outside

Inside - Your inside LAN

Outside - Represents the Internet

Self - This is the router itself, traffic generated by the router and traffic destined to the router, e.g. TACACS+, SSH, Telnet, TFTP, etc.


In Part 2, we'll look at creating a simple guest wireless network which will allow users connected to the Guest wireless to access the Internet, but not the inside LAN.


Define Zone for Zone Based Firewall

Zone security GUEST

! Class-Map that matches criteria specified in the GUEST-TO-OUT-ACL

Class-map type inspect GUEST-TO-OUT-CLASS
 Match access-group name GUEST-TO-OUT-ACL

! Policy-Map to inspect inside traffic going outbound, dropped traffic is logged

Policy-map type inspect GUEST-TO-OUT-POLICY
 Class type inspect GUEST-TO-OUT-CLASS
  Inspect
 Class class-default
  Drop log

! Create Zone Pair and Apply Service-Policy (Policy-Maps)

Zone-pair security GUEST-TO-OUT source GUEST destination OUTSIDE
 Service-policy type inspect GUEST-TO-OUT-POLICY

Assign Zone to router interfaces

Interface GigabitEthernet0/2
 Zone-member security GUEST

! ACL allows GUEST network to access the Internet

ip access-list extended GUEST-TO-OUT-ACL
 permit ip 172.16.0.0 0.0.0.255 any